
How to manage your domain with self hosted Nginx Proxy Manager
Self hosting web applications comes quickly with the need to deal with HTTPS protocol and SSL certificates. The time where web applications was published over the 80/TCP port without any encryption is totally over. Now we have Let's Encrypt and other free certification authority that lets us play web applications with, at least, the basic minimum security required.
A purely peer-to-peer version of electronic cash would allow online payments to be sent directly from one party to another without the burdens of going through a financial institution. Digital signatures provide part of the solution, but the main benefits are lost if a trusted party is still required to prevent double-spending. We propose a solution to the double-spending problem using a peer-to-peer network. The network timestamps transactions by hashing them into an ongoing chain of hash-based proof-of-work, forming a record that cannot be changed without redoing the proof-of-work. The longest chain not only serves as proof of the sequence of events witnessed, but proof that it came from the largest pool of CPU power. As long as honest nodes control the most CPU power on the network, they can generate the longest chain and outpace any attackers. The network itself requires minimal structure. Messages are broadcasted on a best effort basis, and nodes can leave and rejoin the network at will, accepting the longest proof-of-work chain as proof of what happened while they were gone.
Second part of web self hosting stuff that is really useful is the web proxifycation.
It's possible to have multiple web applications accessible through HTTPS but as we can't use the some port (spoiler: we can) we are forced to have ugly URL as https://mybeautifudomain.tld:8443.
This is where Nginx Proxy Manager (NPM) comes to help us.
NPM, as gateway, will listen on the 443 https port and based on the subdomain you want to reach, it will redirect the network flow to the NPM differents declared backend ports. NPM will also request HTTPS cert for you and let you know when the certificate expires, really useful.
We'll now install NPM with docker compose (v2) and you'll see, it's very easy.
You can find the official NPM setup instructions here.
But before we absolutely need to do something. You need to connect to the registrar where you bought your domain name and go into the zone DNS section.
You have to create a A record poing to your VPS IP. That will allow NPM to request SSL certificates for your domain and subdomains.
Create a new folder for the NPM docker stack :
mkdir npm-stack && cd npm-stackCreate a new docker-compose.yml :
nano docker-compose.ymlPaste this content into it (CTRL + X ; Y & ENTER to save/quit) :
version: '3.8'
services:
  app:
    image: 'jc21/nginx-proxy-manager:latest'
    restart: unless-stopped
    ports:
      # These ports are in format <host-port>:<container-port>
      - '80:80' # Public HTTP Port
      - '443:443' # Public HTTPS Port
      - '81:81' # Admin Web Port
      # Add any other Stream port you want to expose
      # - '21:21' # FTP

    # Uncomment the next line if you uncomment anything in the section
    # environment:
      # Uncomment this if you want to change the location of
      # the SQLite DB file within the container
      # DB_SQLITE_FILE: "/data/database.sqlite"

      # Uncomment this if IPv6 is not enabled on your host
      # DISABLE_IPV6: 'true'

    volumes:
      - ./nginxproxymanager/data:/data
      - ./nginxproxymanager/letsencrypt:/etc/letsencrypt
You'll not believe but it's done. NPM docker compose configuration is done.
To start Nginx Proxy Manager with docker compose, you just have to :
docker compose up -dYou'll see :
user@vps:~/tutorials/npm-stack$ docker compose up -d
[+] Running 2/2
 ✔ Network npm-stack_default  Created
 ✔ Container npm-stack-app-1  Started
You can check if NPM container is started by doing this command :
docker psYou'll see :
user@vps:~/tutorials/npm-stack$ docker ps
CONTAINER ID   IMAGE                             COMMAND   CREATED              STATUS              PORTS                                                                                  NAMES
7bc5ea8ac9c8   jc21/nginx-proxy-manager:latest   "/init"   About a minute ago   Up About a minute   0.0.0.0:80-81->80-81/tcp, :::80-81->80-81/tcp, 0.0.0.0:443->443/tcp, :::443->443/tcp   npm-stack-app-1
If the command show "Up X minutes" for the npm-stack-app-1, you're good to go!
You can access to the NPM admin UI by going to http://YourIPAddress:81.
You shoud see :

The default NPM login/password are : admin@example.com/changeme .
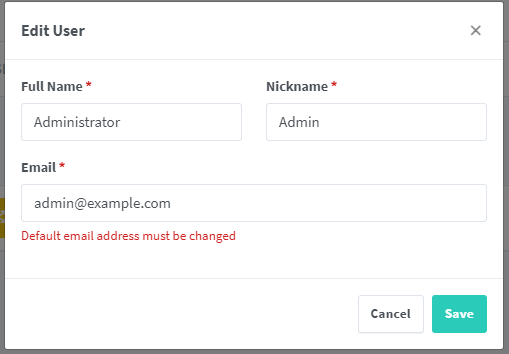
If the login succeed, you should see a popup asking to edit your user by changing your email password :
And your password :
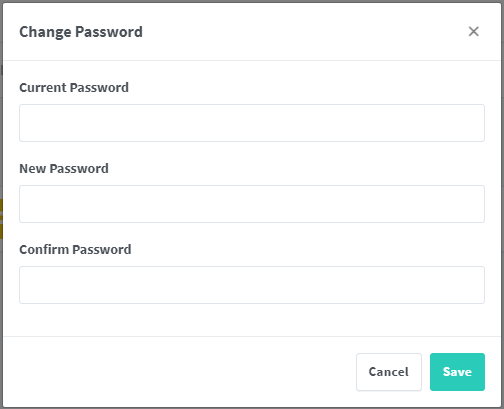
Click on "Save" to finish the login.
To verify if NPM is able to request SSL certificates for you, create first a subdomain for the NPM admin UI :
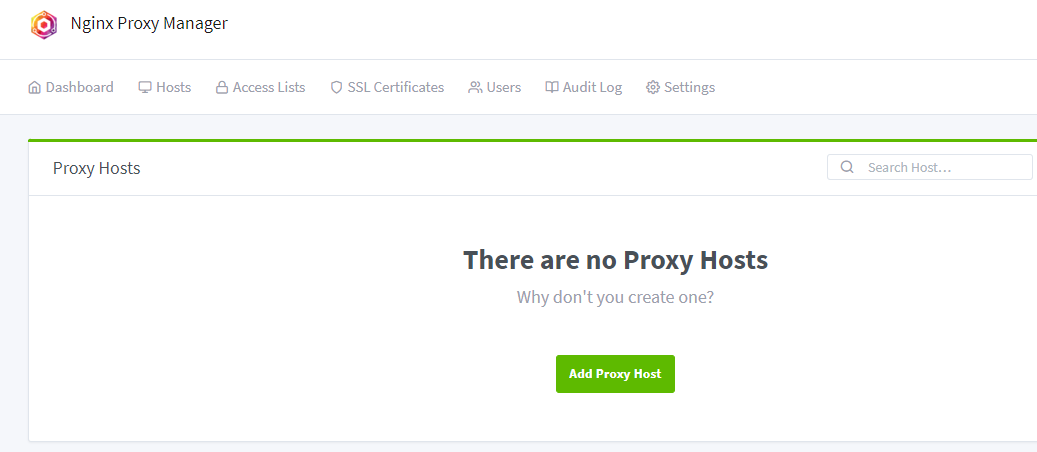
Click on "Hosts" and "Proxy Hosts" :
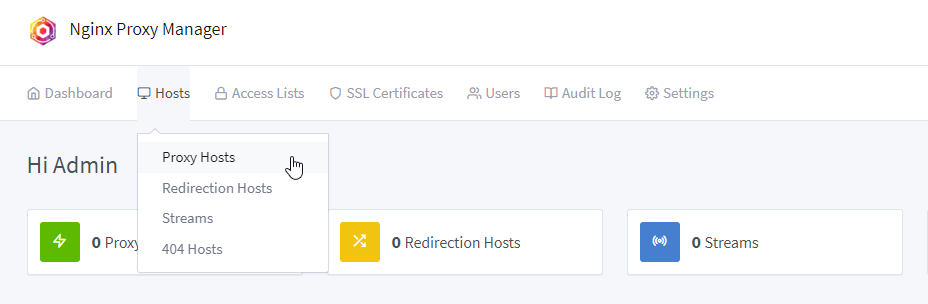
Followed by "Add Proxy Host"
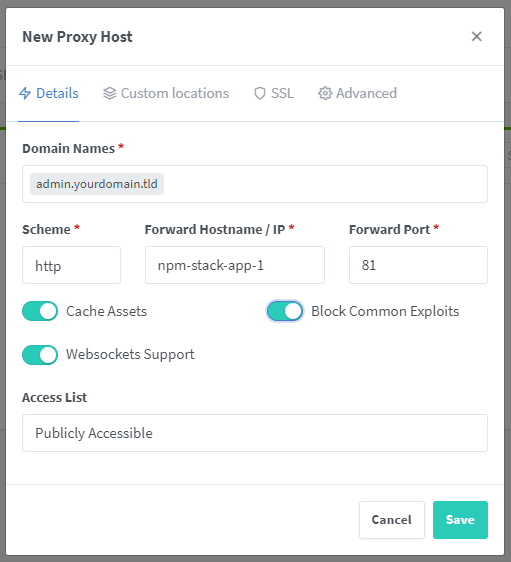
If you want to access the NPM admin UI with https://admin.yourdomain.tld, please set all the parameters like this (I won't explain each parameters) :
Details tab :
SSL tab :
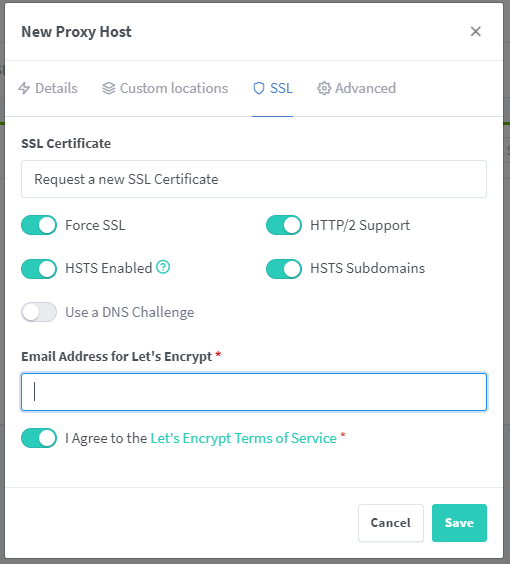
And click on "Save".
NPM will request the SSL certificate "admin.yourdomain.tld" for you.
If you have an erreor message "Internal Error" it's probably because your domaine DNS zone is not configured with an A DNS record pointing to your VPS IP.
Otherwise you should see (my domain is hidden) :

Clicking on the "Source" URL link "admin.yourdomain.tld" will open a pop-up and, surprise, you should see the NPM admin UI with the URL "https://admin.yourdomain.tld" !
If yes, bravo, everything is OK ! 🎇
You know now how to have a subdomain of your domain redirecting to a container web app. In the next blog post, you'll see how to setup a Nostr relay with NPM ;)
Voilààààà
See you soon in another Fractalized story!